
I have started putting together quite the collection of stitch markers. Originally, I stored them in a small jar on top of my crafting dresser. They tended to get tangled, and I struggled to find particular sets when I was looking for them. Today I am sharing my solution.
With this stitch marker display, all of my stitch markers are stored on display. The safety pins keep them in their sets. I can quickly unpin, and take the entire set for my project on the go. Plus, I think they look lovely!


These were quick to make with supplies I happened to have on hand. I have included links to Amazon if you want to purchase the supplies quickly and easily!
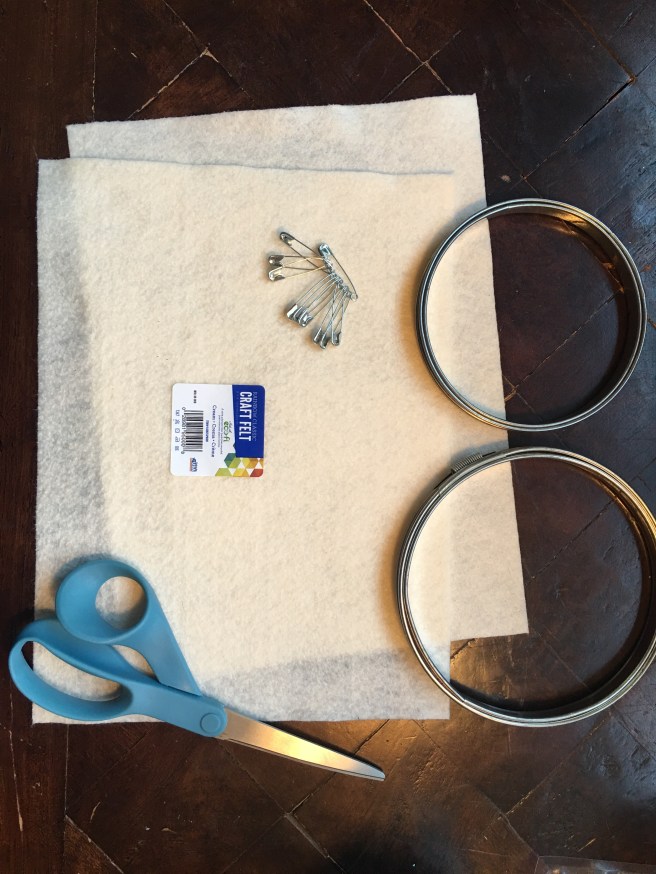
Supplies Needed:

1.Cut felt sheets so that you have a bit of fabric all the way around the hoops.
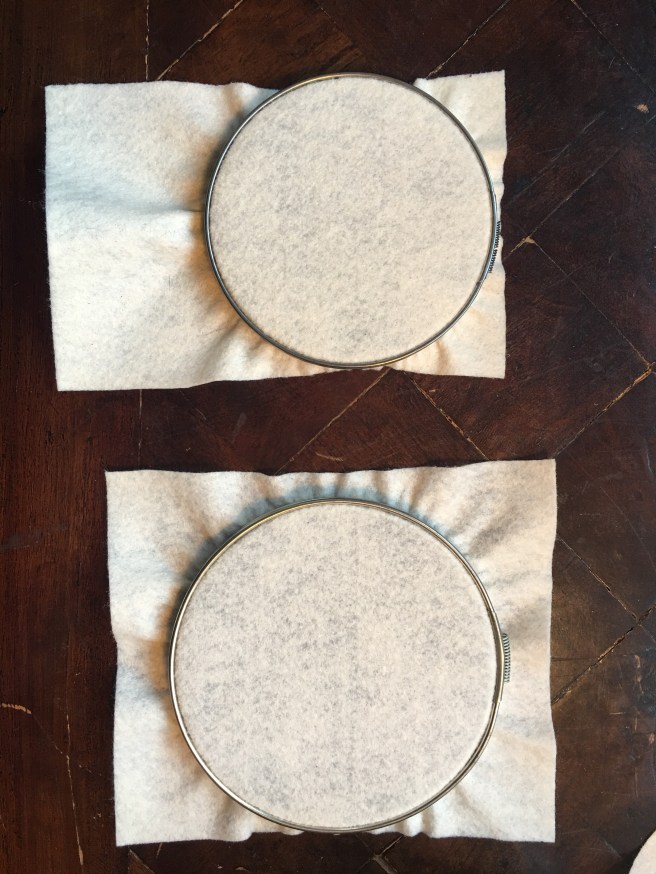
2.Stretch the fabric on the embroidery hoops.

3.Trim extra fabric from the back of the hoop.
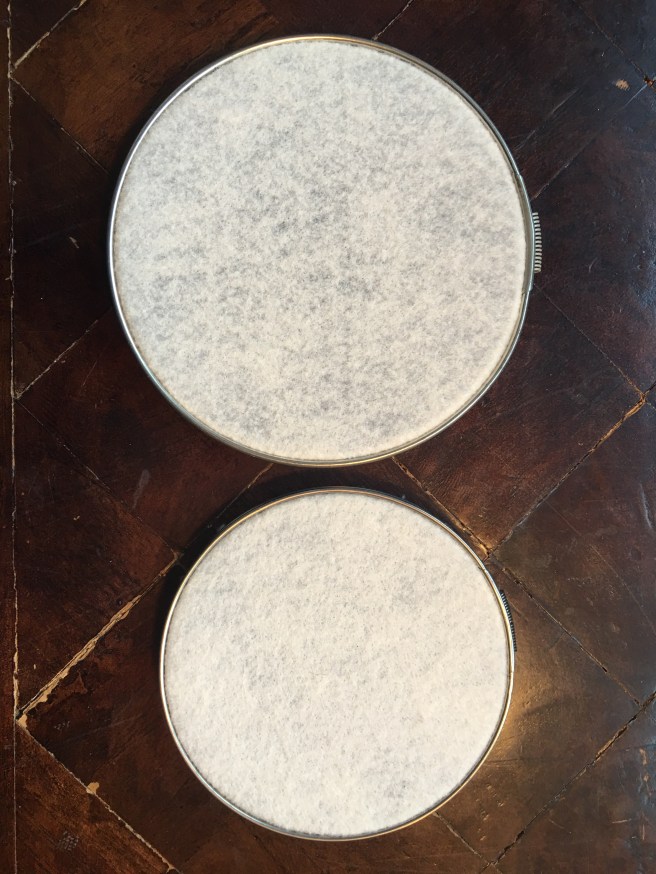
4.Finished! How easy was that?
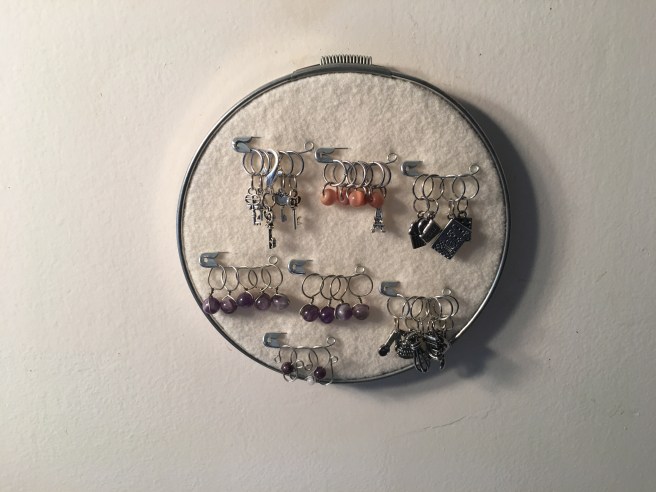
Use the safety pins to display your stitch markers in sets, ready to go!
*This post contains sponsored links from www.amazon.com. I was not paid to do this post. However, if you use the links to purchase, I will receive a small compensation. Thanks for checking it out and helping to support my bloggy habits!*

