
Last fall, I decided to take a day for myself. I left all the family doing what they do, and I drove ALONE to the nearest big city. I spent the day perusing book stores, eating lunch by myself, and wandering JoAnn’s craft store. It was amazing. I haven’t done that in a very, very long time.
After the craziness of last summer, I had been thinking about routines and getting back to basics. This includes getting back to my simple hobbies. One thing I have enjoyed for the last fifteen years is knitting. When my children were small, I would knit or craft every day. It might only be a row or two, but I did something every day. It was my relaxation time. In the last couple of years, I have gotten away from that habit. I miss that meditative process of creating something wonderful from a piece of string.
While I was in JoAnn’s, I decided to purchase everything I would need to make myself a nice warm winter set. I chose a super soft, Buttercream alpaca blend yarn in solid brown and purple. Because of the bulkiness of the yarn, I chose size 10.5 knitting needles in both circular and double point. I didn’t have any scissors with me and I always like to have something to cut the yarn with me in a project. Instead of purchasing another expensive pair of small scissors, I opted for a large seam ripper. I like using seam rippers because they are small, have protective lids over the blades, and cut yarn with ease. Oh, and they are cheap! I also decided to try one of their Snapware Yarn Containers for this project. This large plastic jar is big enough to hold all of my supplies for this project to keep it all clean while crafting on the go. The lid has a hole so I can have my yarn pulling from the center of the skeins to work with both colors without any tangling.
By the time I was done shopping, I was excited to get started on my first non-gift knitting project in a very long time. I headed out to my car, and enjoyed the air conditioning while I casted on my simple knit hat.
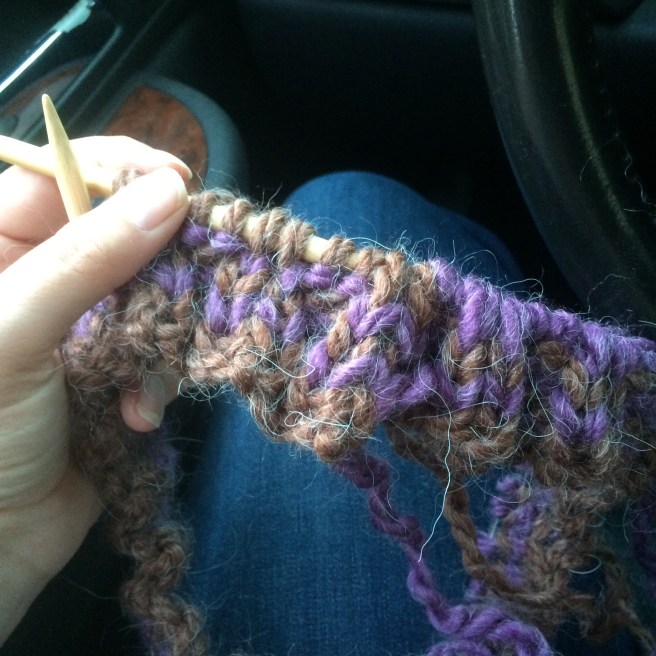
The next day, we had a family reunion to attend. I made a lot of progress during the 45 minute drive. I just love how quickly bulky yarn works up!
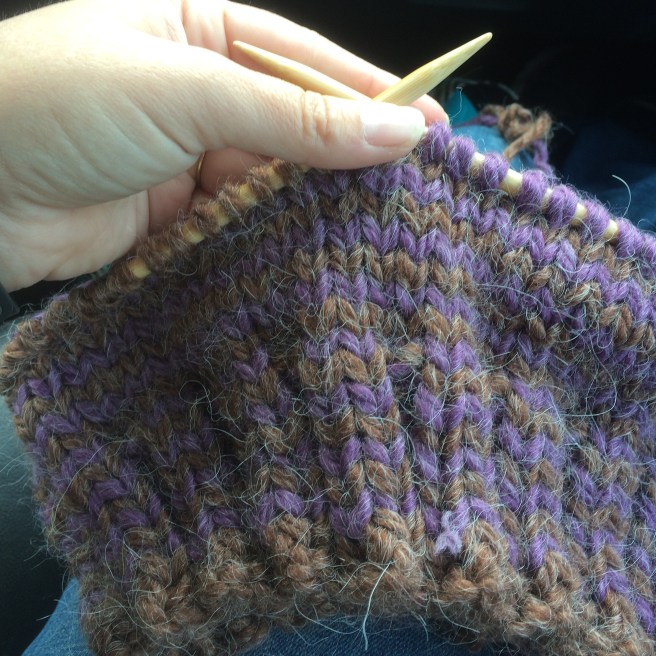
While we visited and relaxed with family, I finished the whole hat. I just need to sew in the ends of the yarn.
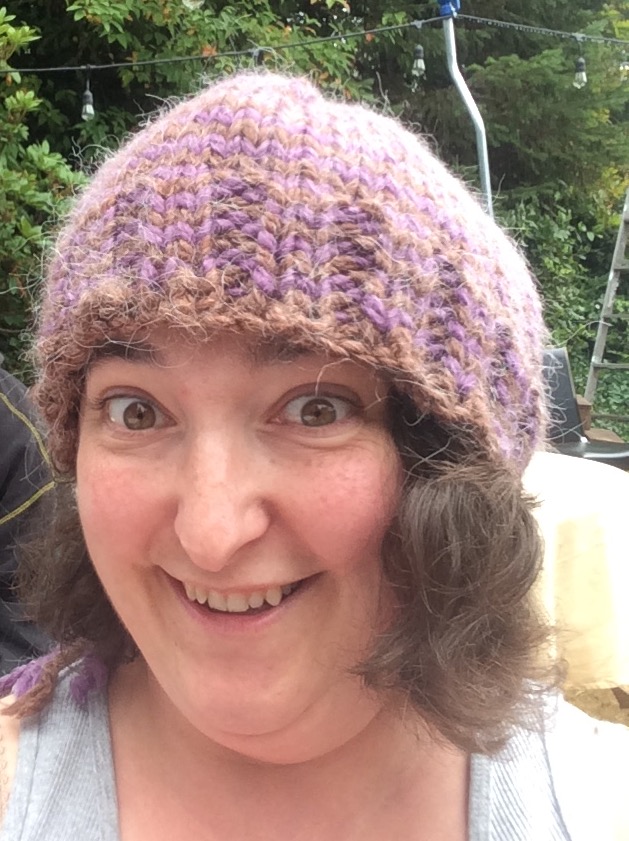
I really love simple knit hats. This bulky alpaca yarn will be nice and warm in winter. The two skeins of yarn should be enough for me to make a hat, finger-less mitts, and a cowl. It really feels great to wear something I have made myself.
This pattern can be used for any size needle and yarn. You just have to adjust your cast on number for the gauge and row count for length. The basic hat has a rib section that is at least an inch to two inches long for the cuff. The knit portion of the hat needs to be long enough for the hat to cover your head all the way to the crown. I often try the hat on while in process to make sure I make it long enough. Once the knit section is long enough for the hat to cover your ears to the crown of your head, you are ready to reduce. The reducing pattern I use goes pretty quickly without looking pointed when you wear it.
The following instructions are for bulky yarn using 10.5 needles. I prefer to start my hats on a circular needle, but if you prefer to work with double points go for it! Also, I like to knit a couple of rows before I connect to knit in the round. This makes it easier for me to see that my stitches aren’t twisted. It is easy enough to use the end of the cast on yarn to stitch up the small opening after the hat is done.
Simple Knit Hat Pattern
Cast on 68. (brown)
Row 1: K2P2 (brown)
Row 2: K2P2 (purple)
Connect to knit in the round.
Row 3: K2P2 (brown)
I switched colors every row to create the stripe pattern. When switching colors, tuck the previous color under the new one before starting your row. This will prevent holes along the seam. I continued this pattern for the remainder of the hat.
Continue the K2P2 rib for a total of 8 rows.
The rest of the hat is worked in all knit. Continue to switch colors every row. Knit for 12 rows. Or until the hat reaches the crown of your head comfortably. The reducing will go pretty quickly, so error on the side of too long if you aren’t sure.
Now is the time to start reducing for the crown of the hat. I transferred to four double point needles at this point. Each needle had 17 stitches.
For each needle: K2tog, K until two stitches left, K2tog
Continue this pattern for each needle until you have three stitches on each needle.
For each needle: K2tog, K1
Cut a nice long tail. Thread the tail through the remaining stitches and drop them off the needles. Pull the tail tight in the inside of the hat to close the top. Tie it off in a knot to hold.
Use a large tapestry needle to sew in your ends and your hat is completed!

